How to Draw Arc in Paint
Excel for Microsoft 365 Discussion for Microsoft 365 Outlook for Microsoft 365 PowerPoint for Microsoft 365 Projection Online Desktop Customer Excel 2021 Give-and-take 2021 Outlook 2021 PowerPoint 2021 Project Professional person 2021 Project Standard 2021 Excel 2019 Word 2019 Outlook 2019 PowerPoint 2019 Project Professional 2019 Project Standard 2019 Excel 2016 Word 2016 Outlook 2016 PowerPoint 2016 Project Professional person 2016 Project Standard 2016 Excel 2013 Word 2013 Outlook 2013 PowerPoint 2013 Projection Professional 2013 Projection Standard 2013 Excel 2010 Word 2010 Outlook 2010 PowerPoint 2010 More...Less
This article discusses drawing curves, circles, and ovals. For information about drawing lines, see Draw or delete a line or connector. For information nigh freeform shapes and editing points in shapes, see Draw or edit a freeform shape.
Describe a bend
-
On the Insert tab, click Shapes.
-
Under Lines, click Curve.
-
Click where yous want the bend to start, drag to describe, and so click wherever you desire to add a curve.
-
To finish a shape, do one of the following:
-
To get out the shape open, double-click at any time.
-
To close the shape, click about its starting point.
-
Depict an oval or circle
-
On the Insert tab, click Shapes.
-
Under Basic Shapes, click Oval.
-
Click where y'all desire the oval to start, and elevate to depict the shape.
-
To describe a circle, printing Shift while you drag.
Notes:
-
You tin change the await of your circumvolve or curve by calculation a shape fill or effect or irresolute the border.
-
If you want to create a more advanced diagram like overlapping circles, an organizational chart, or a flowchart, you can create a SmartArt graphic instead of drawing each shape manually.
-
Circles and ovals are filled automatically. If you lot don't want the shape to obscure anything underneath it, such every bit text or cells, select the shape, and on the Format tab, click Shape Fill, and so click No Fill.
-
Depict a curve
-
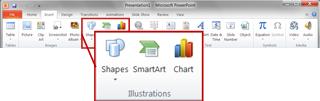
On the Insert tab, in the Illustrations group, click Shapes.
-
Under Lines, click Curve
 .
. -
Click where y'all desire the curve to first, elevate to draw, and so click wherever y'all desire to add together a curve.
-
To end a shape, do one of the post-obit:
-
To exit the shape open up, double-click at any time.
-
To close the shape, click almost its starting indicate.
Note:By default, a closed shape is filled. To make sure that the shape doesn't obscure the cells underneath, select the shape, and then under Drawing Tools, on the Format tab, in the Shape Styles group, click Shape Fill, and then click No Fill
-
Top of Page
Draw an oval or circle
-
On the Insert tab, in the Illustrations group, click Shapes.
-
Nether Basic Shapes, click Oval
 .
. -
Click where you want the circle to start. To make the shape a circle, press and concord SHIFT while you drag to depict.
Notes:
-
Yous can change the wait of your circle or curve by adding a shape fill or shape outcome or changing the shape border.
-
If y'all want to create a more avant-garde diagram like overlapping circles, an organizational chart, or a flowchart, yous tin create a SmartArt graphic instead of drawing each shape manually.
-
By default, a circle or oval is filled. To make sure that the shape doesn't obscure the cells underneath, select the shape, and so nether Drawing Tools, on the Format tab, in the Shape Styles group, click Shape Fill, and and so click No Fill.
-
Summit of Folio
Source: https://support.microsoft.com/en-us/office/draw-a-curve-or-circle-shape-bf9826a8-c21f-4a84-8823-cd90a079f0fd
Belum ada Komentar untuk "How to Draw Arc in Paint"
Posting Komentar